Basic Navigation
This video will highlight the basic navigation of the Template Schedules Page:
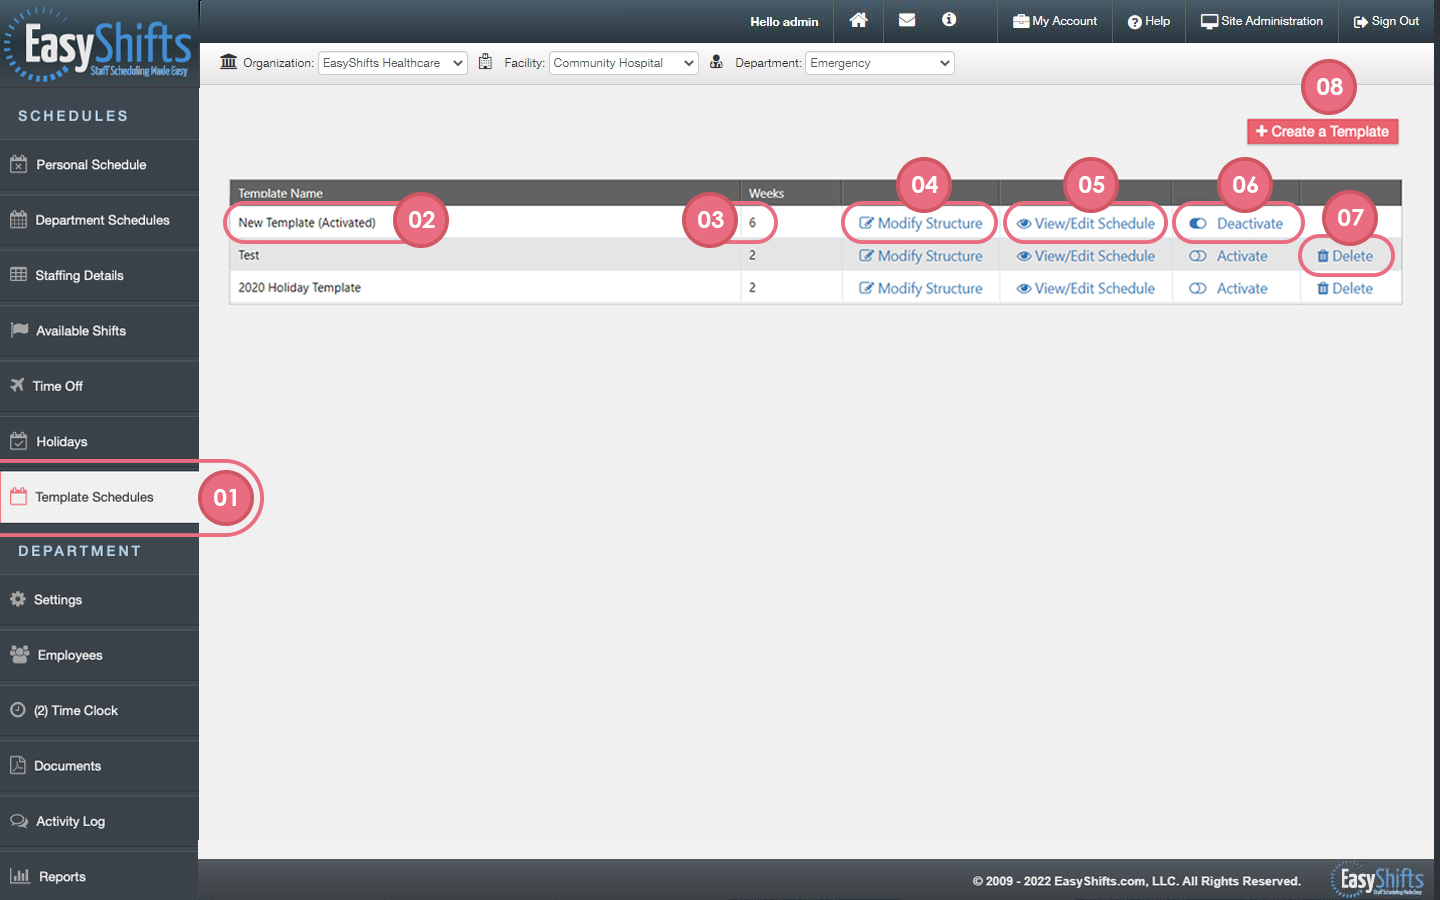
The "Template Schedule" will be the base for all future schedules.
1. The Template Schedule tab is located here.
2. This is the name of your template(s).
3. The "Weeks" column indicates how many weeks are in this particular template.
4. "Modify Structure" allows you to do things like rename your template, add or remove Job Titles, and add or remove weeks from the template schedule.
5. "View/Edit Schedule" allows you to view your template schedule and edit your schedule as needed.
6. The "Activate/Deactivate" button allows you to select which template you want to use. The "Active" template is the one that will be used to create your weekly schedules from. If you want to switch templates, simply click "Activate" on the template you would to use. (note: if you are not able to create weeks on the department schedule page, it's likely that you do not have a template schedule activated)
7. "Delete" will permanently remove the template. Only delete a template if you are sure you will never want to use it again.
8. The "Create a Template" button allows you to add a brand new template to your department.